If you have tasted a Filipino version of braised pork (humba), or paksiw na pata, then you must have tried eating dried banana blossoms. Dried banana blossoms are sometimes used as a substituted for lily blossoms in some Chinese dishes such as hot & sour soup.
In many areas of the country where there is a lot of banana plantations, most of banana blossoms are just thrown away; when in fact they can be processed and sold in the market. So what are they made of, and how to make them? They are made of the flowers “BLOSSOMS”, inside the puso ng saging. The procedure how to preserve them is below:
Ingredients:
1 tbsp sodium metabisulfite
4 c water
sugar, vinegar, soy sauce (to taste)
banana blossoms
Utensils:
measuring spoons/cups
colander
casserole
cheesecloth
stove
drying tray
Procedure:
1. Dissolve 1 tablespoon sodium metabisulfite in four cups water and boil the solution.
2. Strip apart banana blossoms, wrap in cheesecloth, and blanch in the boiling solution for 5 minutes. Drain using colander.
3. Mix equal quantities of sugar, vinegar and soy sauce and soak the blanched blossoms overnight in this mixture.
4. Drain, dry under the heat of the sun and pack in plastic bags.
Source: DOST, Photo courtesy of www.marketmanila.com, and www.pixieate.blogspot.com
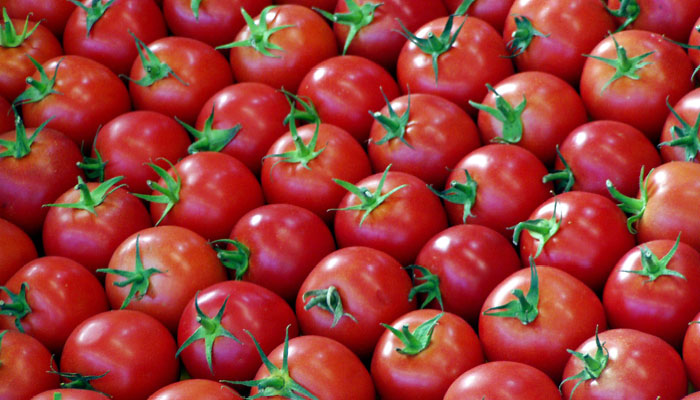
Sa lahat ng dako ng Pilipinas, ang kamatis ay itinatanim para sa pansariling konsumo sa bahay at pambenta. Isa itong pangunahing sangkap sa ensalada at makakain nang hilaw, nilaga, prito at magagawa rin atsara, ketsup at sopas. Ang iba’t-ibang uri nito ay ang sumusunod: Cambal, Ambal o Matikina, Pear Harbor, Pritch & Rutgers, Homestead, Earliana, Ace, Marglobe at Improved Harbor, ang uring pantag-ulan na pinagbuti ng BPI.
Ang kamatis ay tumutubo sa maraming uring lupa, mula sa banlikin hanggang sa lagkitin o sa lupang galas. Kailangan nito ang mainit na panahon at maliwanag na sikat ng araw.
Yes, you can make wine out of Guava. And they taste great. You can also make Guava Jelly.
How to make Guava Wine
Select ripe and sound fruits.
Cut into quarters.
To 1 part fruits, add 2 parts water.
Boil until the fruits are soft.
Strain and measure the extract. To every three (3) parts extract, add 1 part sugar. Stir and measure the extract. Cool.
To every 15 to 15 liters, add one-tablespoon yeast. Place in demijohns to ferment. This will take from two weeks or longer. When the fermentation is completed, transfer into wine barrels and age for at least one year.
How to make Guava Jelly
Select equal mixture of green and ripe guavas.
Wash and cut into halves or quarters.
For every kilo of guavas, add 2 liters of water. Boil in enamel or stainless steel basin for 30 minutes.
Strain thru a cheesecloth bag. Crush the pulp and boil again, using 1 liter of water. Strain and combine the 2 extracts. Measure. To every cup of the extract, add a cup of sugar and 1 tablespoon of calamansi juice.
Boil once to dissolve sugar and strain. Cook over strong fire until the temperature reaches 1070-1080 until a soft ball is formed when the jelly is dropped in a cup of water.
Lamination is used to preserve pictures and documents. It has many uses but the most common are lamination of certificates, diplomas and pictures.
Tools and Materials:
• cellophane plastic sheet (bigger than the flat wooden frame)
• 200g white glue
• 200g pre-mixed resin
• 4g local MEKP hardener
• 30" gold lining
• rubber squeegee
• brush and sponge
• disposable mixing cup
• disposable stirring rod
• 9 .5" x 7.5" flat wooden base
• 13" x 10" wooden frame slightly larger then the base
• 8.5" x 6.5" Certificate
• white sheet or bond paper
Video guide to a related lamination method.
Procedure:
1. Cut a piece of cellophane slightly larger than the wooden base. Put white glue on the frame.
2. Lay the cellophane over the frame. Be sure to stretch the cellophane as the glue dries.
3. When the glue has dried, wipe a damp cloth over the cellophane. The cellophane will expand a little when it is wet. Allow to dry under the sun. The cellophane will then shrink to a very smooth and mirror-like surface when completely dry.
4. Mix water and white glue in a disposable cup until watery. Soak a sponge and wipe the wooden base with thinned glue. Allow a dry. This acts as a wood sealer for the base.
5. Cut a white sheet of paper approximately the same as the certificate. This sheet is the white background of the certificate.
6. Place the certificate and white sheet in the center. Mark the corners of the white sheet on the wooden base to quickly center the sheet later.
7. Using the sponge, again wipe the background sheet with white glue and water, taking care to ease out air bubbles. The sheet will stretch because it is wet.
8. Meanwhile, get the certificate. Dip a brush into pure white glue and brush over the signatures and ll the other names, dates, etc. to seal it and to prevent the ink from bleeding.
9. Once the glue on the signature has dried, put the certificate squarely on the background sheet an then wipe the certificate with the set sponge dipped in water and glue.
10. Adjust the two sheets so the certificate has no bubbles underneath. Cut the excess paper.
11. Cut strips of Gold Lining and glue to the edges of the certificate for a simple yet elegant border.
12. Mix 4g of hardener into the 200g pre-mixed resin, mix thoroughly.
13. Wrap masking tape around the frame. This keeps the excess resin off the frame.
14. Pour the resin mixture in the center of the certificate.
15. Place the frame with the stretched cellophane on top of the certificate. Use squeegee to spread the resin evenly and make sure no bubbles are present. Spreading should be from the center going out. Make sure that all parts of the certificate are covered resin. Allow to cure in 15-30 minutes.
16. Put equal weight on the corners of the laminate to ensure that the cellophane does not lift during the resin curing process. Once cured, tear off the cellophane and sand the edges of the laminated frame.
For supplies and materials:
Polymer Products (Phil.) Inc.
11 Joe Borris St., Bo Bagong Ilog, Pasig City
Tel: 671-9837 to 39
Email: info@polymerprod.com

 If you have tasted a Filipino version of braised pork (humba), or paksiw na pata, then you must have tried eating dried banana blossoms. Dried banana blossoms are sometimes used as a substituted for lily blossoms in some Chinese dishes such as hot & sour soup.