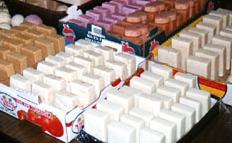
Many big soap businesses today started small, some just as hobbies done in kitchens; and as a marketing strategy, the soap were given away to friends as sample - until the market, an established business, friends etc., choose the soap product, thus creating demand and making the soap popular; as a result the small entrepreneur needed to expand, produce more soap, create a brand and so on and so forth. What made the soap a success? Many reasons and certainly includes quality, price, packaging, creative marketing etc.
Before going into a small scale soap making business, learn the basics first. Remember, this is the basic approach and you can modify this, you can remove or add an ingredient etc. The important thing is you learn basics how to do it - add your creativity, who knows you could come up with a hit product with a soaring demand.
How to make soap by cold press
Product: White creamy laundry bar soap with the essence of citronella or other suitable essential oils.
Materials:
Coconut oil (primary)
Caustic soda (35 Be) as saponifying agent
Sodium silicate as soap builder
Essential oils as perfume
Equipment:
Cylindrical soap mixer, pedal type (16 liters)
Moulder with cutter (71.5 cm. x 38 cm. x 3 cm.)
Oil storage container, 20 kg. capacity
Percolator, 1 gallon capacity
Procedure:
Five liters coconut oil is measured and transferred to a steel cylindrical soap mixer. A volume of 2.3 liters of caustic soda is slowly added to the oil with stirring for 20 minutes. 0.25 liters of sodium silicate and 0.02 liter essential oil are added and continuously mixed and stirred for 10 minutes. The homogenous viscous soap mixture is poured into the moulder and is made to stand for seventy-two (72) hours at room temperature to complete saponification. The soap is extruded from the mould and is divided into bars by passing through a wire cutter. Soap bars are packed in polyethylene bags then into boxes for storage.
Source: Technology developed by: Industrial Technology Development Institute (DOST) , photo courtesy of millersoap.com
Before going into a small scale soap making business, learn the basics first. Remember, this is the basic approach and you can modify this, you can remove or add an ingredient etc. The important thing is you learn basics how to do it - add your creativity, who knows you could come up with a hit product with a soaring demand.
How to make soap by cold press
Product: White creamy laundry bar soap with the essence of citronella or other suitable essential oils.
Materials:
Coconut oil (primary)
Caustic soda (35 Be) as saponifying agent
Sodium silicate as soap builder
Essential oils as perfume
Equipment:
Cylindrical soap mixer, pedal type (16 liters)
Moulder with cutter (71.5 cm. x 38 cm. x 3 cm.)
Oil storage container, 20 kg. capacity
Percolator, 1 gallon capacity
Procedure:
Five liters coconut oil is measured and transferred to a steel cylindrical soap mixer. A volume of 2.3 liters of caustic soda is slowly added to the oil with stirring for 20 minutes. 0.25 liters of sodium silicate and 0.02 liter essential oil are added and continuously mixed and stirred for 10 minutes. The homogenous viscous soap mixture is poured into the moulder and is made to stand for seventy-two (72) hours at room temperature to complete saponification. The soap is extruded from the mould and is divided into bars by passing through a wire cutter. Soap bars are packed in polyethylene bags then into boxes for storage.

